Troubleshooting Instrumentation of Furcations, Concavities, and Depressions
The use of site-specific ultrasonic inserts/tips can help improve the success of nonsurgical periodontal therapy.
Part 2 of a Two-Part Series: Part one discussed design characteristics, selection and sequence, and technique to access periodontal pockets on proximal surfaces of posterior teeth. It appeared in the April issue of Dimensions of Dental Hygiene.
Ultrasonic instrumentation is an important part of successful nonsurgical periodontal therapy. However, it is not a panacea and requires appropriate power, proper ultrasonic insert/tip (UIT) selection (size and metal mass), variety of fulcrums, and multidirectional strokes. The traditional straight UIT becomes less effective as probing depths increase. The implementation of right- and left-curved UITs can enable clinicians to access difficult-to-reach areas because they can adapt to root structures found in posterior teeth, including furcations, concavities, and depressions.
FURCATIONS
Research suggests that teeth with furcation involvement are at increased risk of poor prognosis compared with teeth without furcations.1 Therefore, the ability to thoroughly debride furcations is necessary to maintain gingival health. Specifically, using thin UITs can be more effective than hand instrumentation in accessing Class II and III furcation areas due to the small diameter of the UIT compared with standard Gracey curets. Effective debridement of the furcation at the roof is more likely when thin right- and left-curved UITs are used—due to their curved design and ability to adapt into the root trunk—compared with thin straight UITs.
Similar to the vertical orientation of the proximal surfaces, a curved UIT can approach the furcation at a 0° to 15° angulation with vertical and horizontal strokes. A transverse orientation is necessary to debride the mesial surface of the distal root and distal surface of the mesial root of Class II and III furcations. A thin 0.8 mm ball-end curved UIT is also available to access and debride the roof of the furcation. This UIT offers a greater tip surface area and is designed to improve contact with the concave contours without the risk of root gouging. The ball-end may remove biofilm but leave remnants of flattened calculus. Therefore, the roof or floor of furcations must be followed up with micro- and mini-bladed and/or diamond file hand instruments that follow the curvatures of these root surfaces in order to complete periodontal debridement.
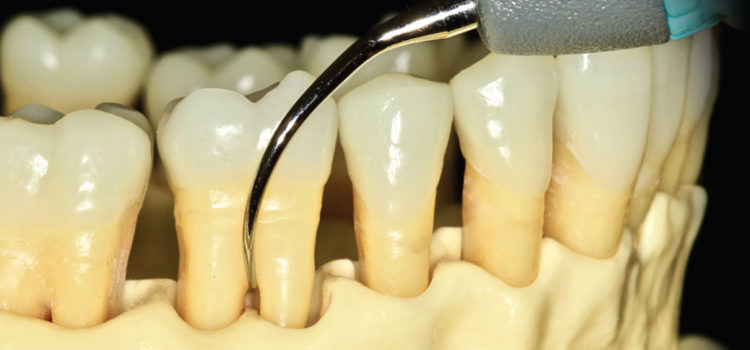
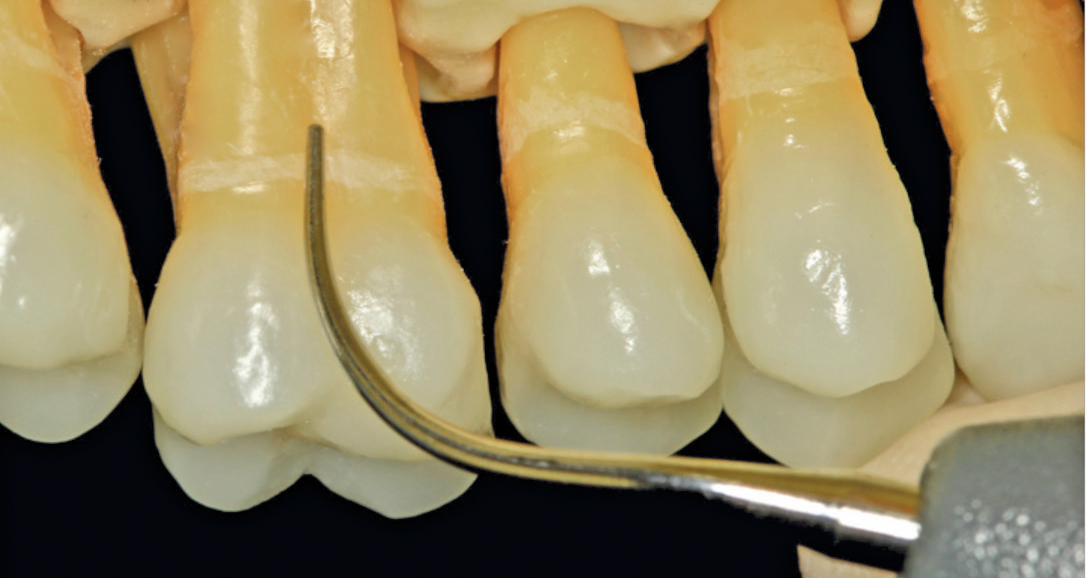
Recommended Technique: Lower Right Posterior Teeth, Buccal Furcation
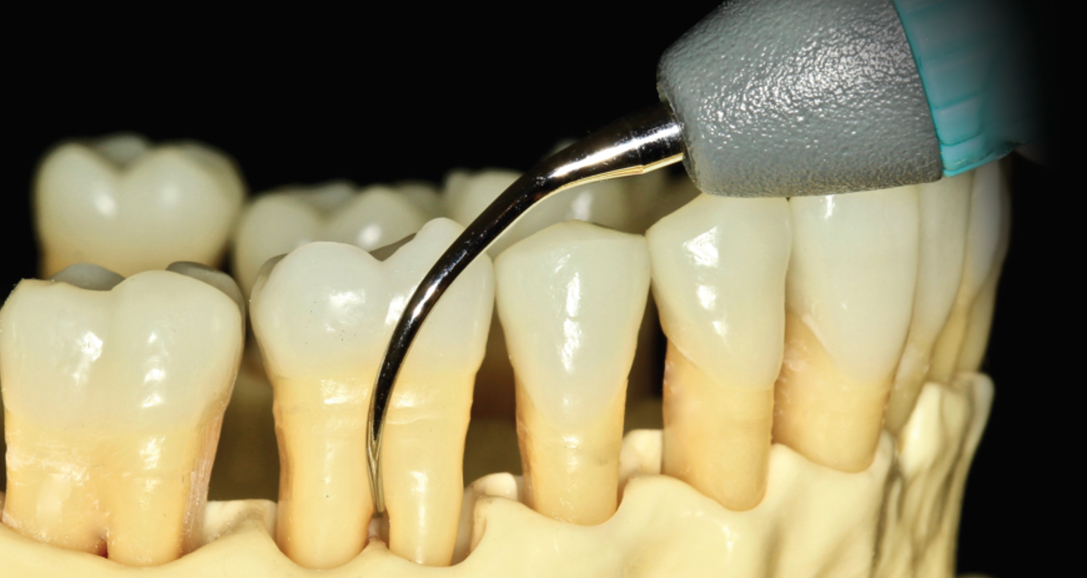
To debride a lower right buccal furcation, place the patient in a semi-supine position and sit at an 8 o’clock to 9 o’clock position. The left-curved UIT can first be used in a tip down, vertical orientation. With the middle finger and thumb, roll the UIT to adapt as far into the roof as possible (Figure 1). Depending on whether a piezoelectric and magnetostrictive UIT is used, as the furcation is entered, the handle will slightly cross over the occlusal plane to allow the lateral surface or concave face of the left-curved UIT to access the furcation. Vertical and horizontal strokes can be used at the buccal furcation, especially when initially entering the root trunk. The left UIT can then be implemented in a transverse orientation to debride the roof of the buccal furcation, mesial surface of the distal root, and distal surface of the mesial root (Figure 2).
CONCAVITIES AND DEPRESSIONS
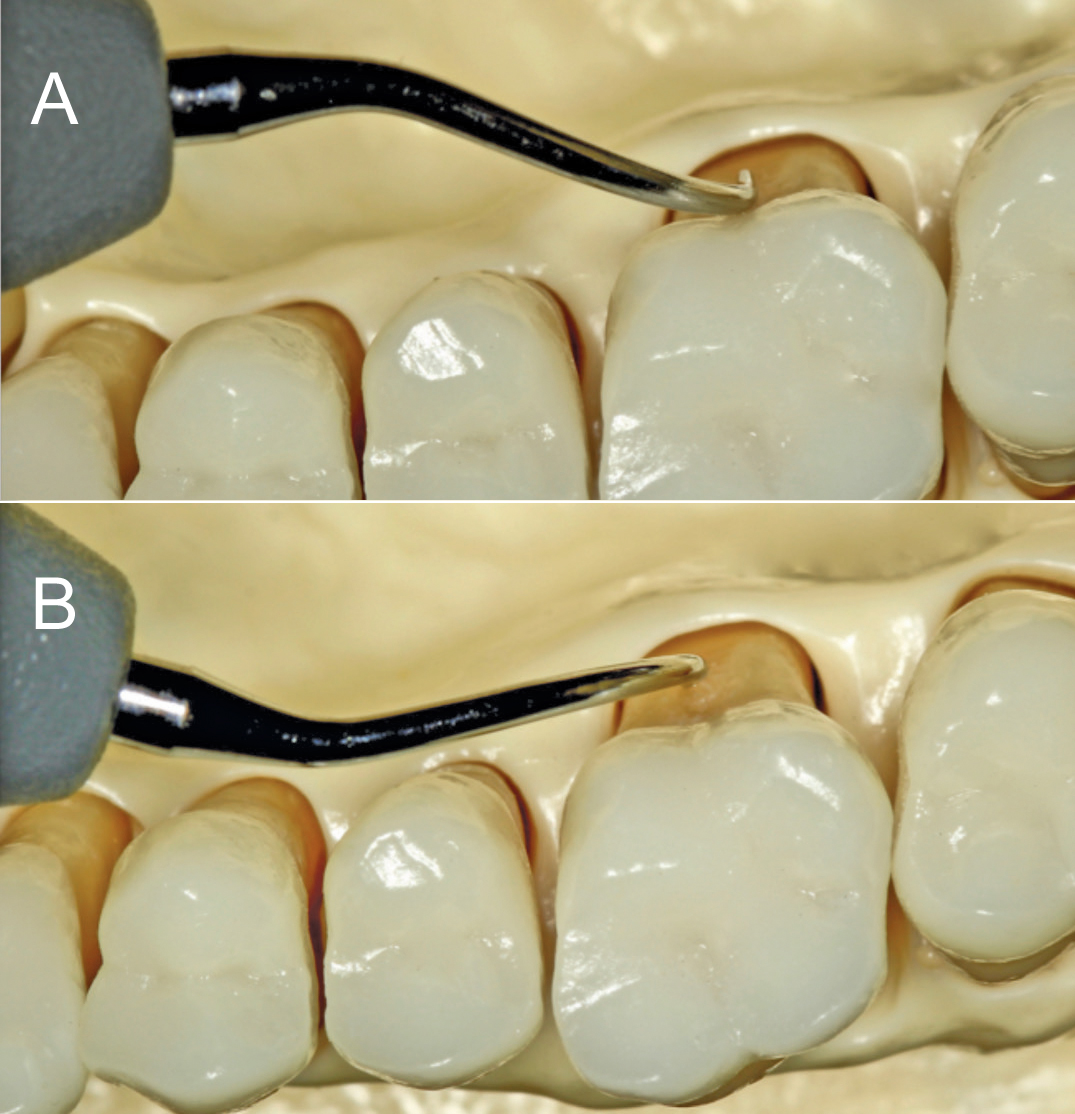
Challenges in accessing and adapting the terminal 2 mm to 4 mm of the anterior side of the UIT along the concavities and depressions—especially at proximal surfaces—may arise with standard or thin straight UITs. Right- and left-curved UITs are ideal for adaptation and less likely to cause tissue distension and damage because of the curvature of their tips. The use of cross-hatching strokes with a vertical orientation for oblique strokes, followed by transverse orientation for vertical strokes will assist in eliminating soft and hard deposits in the concavities of proximal surfaces. For buccal or lingual depressions, selecting the appropriate right- or left-curved UIT is critical to the following:
- Maintaining 0° to 15° angulation with the tooth surface
- Allowing access into the concavity
- Preventing the point of the UIT from cutting a groove into the root surface
- Avoiding tissue distension (Figure 3). Short channeling, 1 mm to 2 mm strokes will conform to concavities better than longer strokes and may reduce the risk for residual and burnished calculus.2
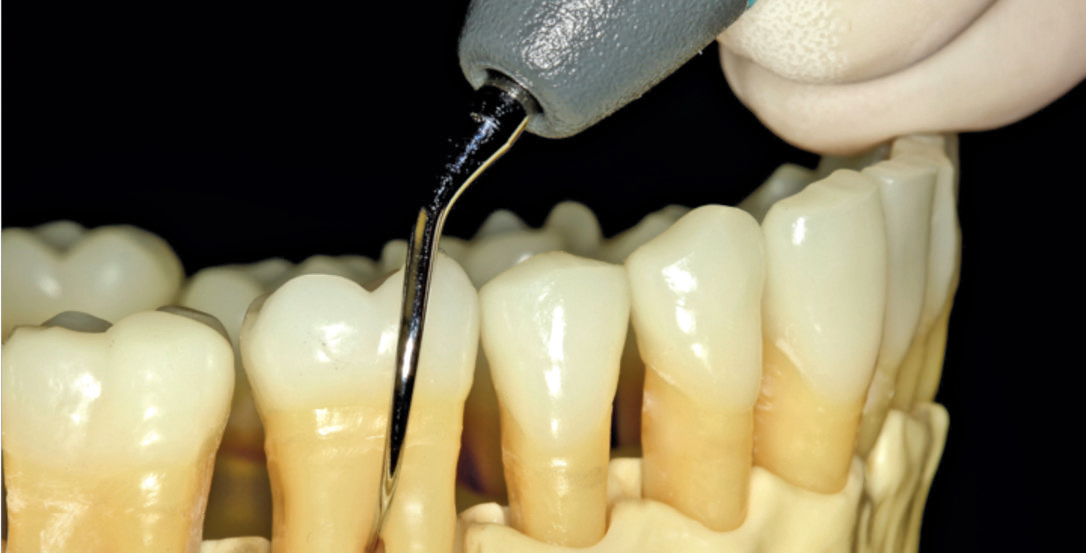
Recommended Technique: Upper Right Posterior Teeth, Lingual Concavity or Depression
Begin by positioning the patient in a supine position with the chin raised. Sit approximately at the 1 o’clock or 2 o’clock position with a same arch, intraoral hand rest. The right UIT is used in a vertical orientation first with probe-like strokes to break up calculus, followed by horizontal strokes for complete coverage of the lingual concavity or depression (Figure 4). This will ensure the 2 mm to 4 mm terminal tip of the UIT remains adapted as it is maneuvered to the apex of the root. Either the right- or left-curved UIT may be used for any buccal or lingual approach as long as the adaptation of the most active sides of the tip of a magnetostrictive or piezoelectric UIT is considered. Using the appropriate intraoral, same-arch, or extraoral opposite-arch hand rest and the right type of directional stroke are key.
Selection of a right- or left-curved UIT must be determined by the instrument’s ability to properly adapt without causing structural damage to root surfaces. Therefore, when making clinical decisions with right- or left-curved UITs, dental hygienists should implement these techniques. After finishing with powered instrumentation, complete debridement must be followed up with root planing and finishing hand instrumentation. Innovations of micro- and mini-bladed Gracey curets have made it possible to access difficult-to-reach areas with tight tissue, narrow and deep periodontal pockets, furcations, concavities, and depressions, whereas UITs and standard Gracey curets are unable to successfully remove calculus alone. The superior adaptation of the micro- and mini-bladed and/or diamond file Gracey curets allow further removal of calculus left behind during ultrasonic instrumentation.
CONCLUSION
The risk of periodontal tooth loss may be reduced with a thorough diagnosis that uses a combination of probing-depth assessment, radiographic examination, and ultrasonic and hand instrumentation. UIT selection ultimately depends on clinician strengths and limitations and specific patient considerations. The correct use of right- and left-curved UITs can support the success of nonsurgical periodontal therapy.
Featured photo courtesy of MICHAELA NGUYEN, RDH, MS
From Dimensions of Dental Hygiene. July 2017;15(7):28-30.
